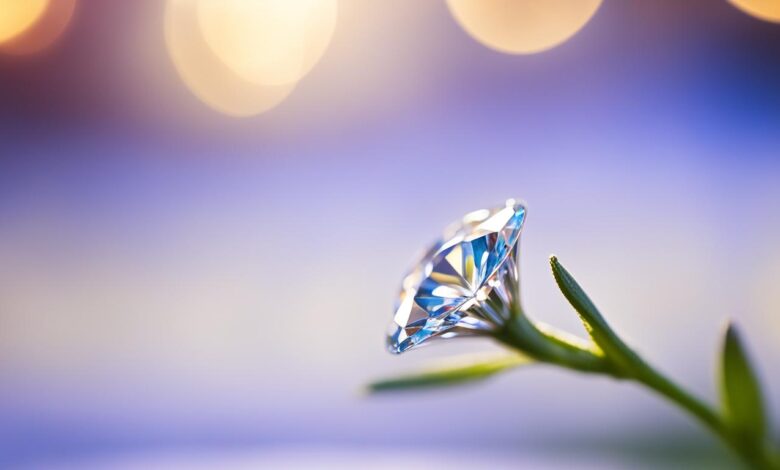
Mastering Bokeh Photography in 2024: Tips, Tricks, and Techniques
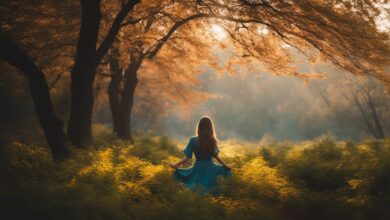
Imagine yourself strolling through a vibrant garden on a bright sunny day. The air is filled with the fragrance of blooming flowers, and butterflies dance delicately from petal to petal.
As you reach for your camera to capture the beauty around you, you notice something magical happening. The background seems to melt away, creating a dreamy, blurred effect that brings your subject into sharp focus. That, my friend, is the enchanting world of bokeh photography.
Bokeh photography has become a popular trend in recent years, captivating photographers and viewers alike with its ethereal and artistic appeal. It is the art of creating a soft, out-of-focus background that enhances the subject and adds depth to the image.
Bokeh, derived from the Japanese word “boke,” meaning blur or haze, refers to the aesthetic quality of the out-of-focus areas in a photograph.
In this article, we will dive into the world of bokeh photography, exploring tips, tricks, and techniques to help you master this technique in 2024.
Whether you’re a beginner or an experienced photographer, this guide will provide you with the knowledge and inspiration to capture stunning images with dreamy backgrounds and standout subjects. Let’s embark on this journey together and unlock the secrets of bokeh photography.
Key Takeaways:
- Bokeh photography adds depth and visual interest to images by creating a soft, out-of-focus background.
- Understanding the definition, origins, and aesthetic appeal of bokeh is crucial for mastering this technique.
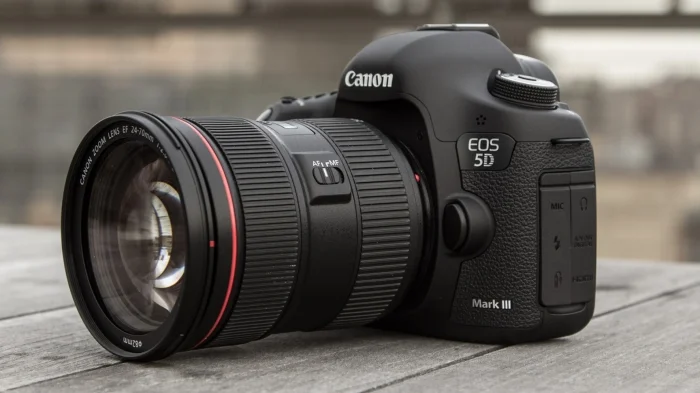
- Choosing the right equipment, such as lenses and cameras, is essential for capturing stunning bokeh.
- Mastering camera settings, including aperture, shutter speed, ISO, and focus modes, is key to achieving desired bokeh effects.
- Composition techniques, lighting techniques, and post-processing techniques can further enhance the bokeh effect in your photographs.
What is Bokeh Photography?
Bokeh photography is a technique that focuses on capturing the aesthetic quality of the out-of-focus areas in a photograph. Derived from the Japanese word “boke,” which means blur or haze, bokeh adds a captivating softness and depth to images.
The origins of bokeh can be traced back to the early days of photography when photographers discovered the artistic appeal of using wide apertures to create a pleasing blur in the background.
The primary characteristic of bokeh photography is the beautiful, creamy background created by the out-of-focus elements, which enhances the main subject and draws attention to it. This effect adds a sense of depth and visual interest to the composition, making the image more engaging and aesthetically pleasing.
It’s important to understand the difference between bokeh and blur. While both terms refer to the out-of-focus areas in a photograph, bokeh specifically describes the quality of the blur, which is characterized by its smooth and pleasing appearance.
Blur, on the other hand, refers to any type of unfocused elements in the image, but it may not necessarily have the same aesthetic appeal as bokeh.
| Bokeh Photography | Blur Photography |
|---|---|
| Creates a soft and creamy background | Can vary in appearance and may not have the same aesthetic appeal |
| Adds depth and visual interest to the image | Can be caused by various factors, such as camera shake or subject movement |
| Enhances the main subject | May not necessarily enhance the overall composition |
Essential Equipment for Stunning Bokeh Photography
When it comes to capturing stunning bokeh photography, having the right equipment is essential. In this section, we will explore the key components that contribute to creating beautiful bokeh effects in your images.
From lenses to cameras, understanding the essential equipment will help you elevate your bokeh photography game in 2024.
Choosing the Right Lens for Bokeh Effects
The lens you use plays a crucial role in achieving captivating bokeh effects. Prime lenses, with their fixed focal length, are a popular choice among bokeh enthusiasts. These lenses typically have larger maximum apertures, allowing for a shallower depth of field and enhancing the bokeh effect.
Zoom lenses, on the other hand, offer more versatility with their variable focal length but often have a smaller maximum aperture, resulting in a narrower depth of field.
Prime Lenses vs. Zoom Lenses for Bokeh
Prime lenses excel at producing creamy bokeh due to their wider maximum apertures. The shallow depth of field and smooth out-of-focus areas create a dreamy background that beautifully complements the subject.
Zoom lenses, while offering flexibility in focal length, may have limitations in creating the same level of bokeh due to their narrower apertures. If bokeh photography is your primary focus, investing in a high-quality prime lens is highly recommended.
The Impact of Aperture on Bokeh Quality
Aperture, represented by the f-stop value, is a critical factor in achieving stunning bokeh. A wider aperture (smaller f-stop number) allows more light to enter the lens, creating a shallower depth of field and contributing to a more pronounced bokeh effect.
By shooting with a wide aperture, such as f/1.8 or f/2.8, you can emphasize your subject and blur the background, resulting in a mesmerizing bokeh that draws the viewer’s attention.
Full-Frame vs. Crop-Sensor Cameras for Bokeh
The choice between a full-frame and a crop-sensor camera can also impact your bokeh photography. Full-frame cameras offer larger sensors, which can capture more light and produce a shallower depth of field, enhancing the bokeh effect.
Crop-sensor cameras, while having smaller sensors, can still create beautiful bokeh but may require a wider aperture or closer proximity to the subject. Ultimately, both types of cameras can deliver impressive bokeh, so consider your shooting style and budget when making your choice.
Mastering Camera Settings for Bokeh Photography
When it comes to capturing stunning bokeh photography, understanding and mastering the camera settings is essential. In this section, we will dive into the key camera settings that will help you achieve the desired bokeh effect in your photographs.
Aperture: The Key to Controlling Depth of Field
Aperture plays a crucial role in bokeh photography as it directly impacts the depth of field and the quality of the bokeh effect. By adjusting the aperture, you can control how much of the scene is in focus and how much is beautifully blurred.
To achieve a shallow depth of field and creamy bokeh, choose a wide aperture (small f-number). This allows more light to enter the lens and creates a narrow plane of focus, separating the subject from the background.
Experimenting with different aperture settings will give you a better understanding of how it affects the bokeh and depth of field in your images.
Shutter Speed: Balancing Exposure and Bokeh
While aperture affects the visual quality of bokeh, shutter speed is crucial for balancing the exposure and maintaining the bokeh effect. In bokeh photography, it’s important to achieve proper exposure while keeping the background beautifully blurred.
When shooting in manual mode, start by setting your desired aperture and then adjust the shutter speed accordingly. A faster shutter speed helps to prevent overexposure, while a slower shutter speed allows more light to enter the camera and can enhance the bokeh effect.
Remember to use a tripod or stabilize your camera when using slower shutter speeds to ensure sharp subjects and minimize camera shake.
ISO: Managing Noise and Low-Light Situations
ISO determines the camera sensor’s sensitivity to light. When shooting in low-light situations, such as during sunset or indoors, increasing the ISO can help maintain proper exposure.
However, higher ISO settings can introduce noise or graininess in the image, which may affect the quality of the bokeh.
It’s important to find the right balance between ISO and exposure. Start with a lower ISO setting and gradually increase it if necessary, ensuring that the background remains smooth and noise-free.
Focus Modes and Techniques for Sharp Subjects and Creamy Bokeh
Focusing is crucial for achieving sharp subjects and creamy bokeh. Experiment with different focus modes and techniques to ensure accurate and precise focus in your bokeh photography.
One technique is to use the AF-S (Single-Servo AF) mode, where the camera locks the focus once when the shutter button is half-pressed. This mode is useful for still subjects.
For moving subjects, consider using the AF-C (Continuous-Servo AF) mode, which allows the camera to continuously adjust focus as the subject moves.
Mastering camera settings is essential for capturing stunning bokeh photography. By understanding aperture, shutter speed, ISO, and focus modes, you can control the depth of field, balance exposure, manage noise, and ensure sharp subjects with creamy bokeh. Experimenting with these settings will allow you to unleash your creativity and create captivating bokeh images.
Composition Techniques for Bokeh Photography
Composition is a fundamental aspect of bokeh photography that can make or break your images. By employing certain techniques, you can enhance the overall visual appeal and impact of your bokeh compositions. In this section, we will explore key composition techniques that will help you create stunning bokeh photographs.
Subject Placement and Distance for Optimal Bokeh
When capturing bokeh, the placement and distance of your subject in relation to the background play a crucial role. To achieve optimal bokeh, place your subject in the foreground and maintain a significant distance between the subject and the background.
This distance creates a shallow depth of field, resulting in a beautifully blurred background that accentuates the bokeh effect.
Background Selection and Separation
The choice of background can greatly impact the overall composition of your bokeh photographs. Select backgrounds with interesting textures, colors, or patterns that complement your subject.
Ensure there is enough separation between your subject and the background to create a distinct separation, allowing the bokeh to stand out. Experiment with different backgrounds to add depth and visual interest to your compositions.
Framing and Leading Lines in Bokeh Compositions
Framing your subject within the composition can add a sense of structure and focus to your bokeh photographs. Look for natural frames, such as branches or archways, to guide the viewer’s eye towards the subject.
Additionally, leading lines, whether straight or curved, can create a visual flow and draw attention to the focal point of your image. Use these compositional elements strategically to enhance the overall impact of your bokeh compositions.
Incorporating Foreground Elements for Added Depth
To add depth and create a sense of 3-dimensionality in your bokeh compositions, incorporate foreground elements.
These elements can include foliage, objects, or people positioned in front of the subject. By having elements in the foreground, you create additional layers in your image, adding visual interest and enhancing the overall depth of field. Experiment with different foreground elements to create unique and captivating bokeh compositions.
| Composition Techniques | Description |
|---|---|
| Subject Placement and Distance | Position the subject in the foreground and create distance between the subject and the background to achieve optimal bokeh. |
| Background Selection and Separation | Select backgrounds that complement your subject and create separation to make the bokeh effect stand out. |
| Framing and Leading Lines | Use natural frames and leading lines to guide the viewer’s eye towards the subject and create visual flow. |
| Incorporating Foreground Elements | Add depth and interest to your bokeh compositions by including foreground elements in front of the subject. |
Lighting Techniques for Enhancing Bokeh
Lighting plays a crucial role in capturing stunning bokeh photography. By understanding and utilizing various lighting techniques, you can enhance the bokeh effect in your images. This section will explore different lighting strategies that will take your bokeh photography to the next level.
Natural Light: Golden Hour and Backlight for Bokeh
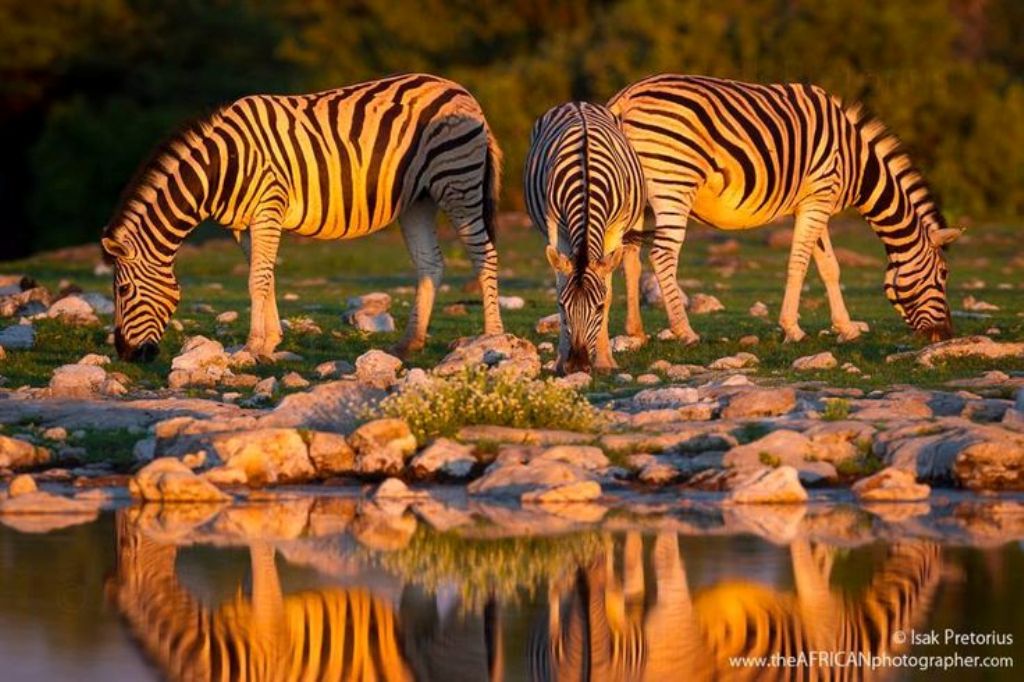
Natural light is one of the most beautiful and versatile lighting sources for bokeh photography. The golden hour, which occurs shortly after sunrise or before sunset, provides the perfect soft, warm light that enhances the bokeh effect.
During this time, the low angle of the sun creates captivating shadows and highlights, adding depth and dimension to your bokeh images.
Another natural lighting technique is utilizing backlight. By positioning your subject between the camera and a strong light source, such as the sun, you can create a dreamy bokeh effect and a beautiful halo around your subject.
This technique works particularly well for capturing bokeh portraits.
Artificial Light: Creating Bokeh with String Lights and Candles
Artificial light can also be used creatively to enhance the bokeh effect in your photographs. String lights are a popular choice for creating a whimsical and magical atmosphere.
By placing them in the background of your scene and using a wide aperture, you can turn the string lights into captivating bokeh orbs that add visual interest to your composition.
Candles can also be a fantastic light source for creating bokeh. By placing candles strategically around your subject, you can create a warm and intimate ambiance.
The flickering flames and soft glow of candles can produce stunning bokeh, especially when combined with a shallow depth of field.
Reflective Surfaces: Capturing Bokeh in Water and Glass
Reflective surfaces like water and glass provide unique opportunities for capturing bokeh. By incorporating these elements in your compositions, you can create mesmerizing reflections and light patterns that enhance the bokeh effect.
Try photographing a subject near a body of water or shooting through a glass object to experiment with these reflective bokeh techniques.
Low-Light Bokeh Photography: Tips and Tricks
Low-light situations present exciting challenges and opportunities for bokeh photography. To achieve stunning low-light bokeh, consider the following tips and tricks:
- Use a tripod or stabilize your camera to avoid camera shake and capture sharp bokeh.
- Increase your ISO to compensate for the lack of light, but be mindful of the noise that can affect the quality of the bokeh.
- Experiment with long exposures to capture the movement of light sources and create dynamic bokeh effects.
- Consider using a wide aperture to allow more light into your camera and create a shallow depth of field.
By mastering the art of lighting in bokeh photography, you can elevate your images and create captivating visuals.
Whether it’s harnessing the beauty of natural light or creatively using artificial light sources, the right lighting techniques can truly enhance the bokeh effect and bring your photography to life.
Creative Bokeh Photography Techniques
Shaped Bokeh: DIY Filters and Lens Attachments
One way to add a unique touch to your bokeh photography is by creating shaped bokeh. By using DIY filters and lens attachments, you can transform the out-of-focus highlights into various shapes, such as hearts, stars, or even your own custom designs.
This technique allows you to get creative with your bokeh and bring a personalized touch to your images. To create shaped bokeh, you can make your own filter using black cardstock or purchase pre-made lens attachments designed specifically for this purpose.
Experiment with different shapes and sizes to achieve the desired effect and make your bokeh photography stand out.
Multiple Exposure Bokeh: Combining Sharp and Blurred Elements
Incorporating multiple exposures into your bokeh photography can produce stunning and ethereal results. By capturing a series of images with varying focus points and combining them in post-processing, you can create a unique blend of sharp and blurred elements within your bokeh. This technique adds a sense of depth and intrigue to your photos, making them visually captivating.
Experiment with different compositions and subjects to achieve the desired effect, and use post-processing software with multiple exposure blending capabilities to merge your images seamlessly. Multiple exposure bokeh allows you to push the boundaries of creativity and create mesmerizing visuals.
Bokeh Panoramas: The Brenizer Method
If you want to capture expansive scenes with a beautiful bokeh effect, the Brenizer method is a technique worth exploring. This method involves capturing a series of overlapping images with a shallow depth of field and merging them together to create a panoramic view with stunning bokeh throughout.
The result is a wide-angle image that combines the shallow depth of field of a telephoto lens with the wide perspective of a wide-angle lens, resulting in a unique and visually striking composition.
To achieve this effect, select a subject, set your camera to manual mode, and capture a series of images while maintaining consistent exposure settings. Once you have captured all the images, use post-processing software to stitch them together and create your bokeh panorama.
Bokeh in Motion: Capturing Movement with Slow Shutter Speeds
To add a sense of dynamic energy and movement to your bokeh photography, try capturing bokeh in motion using slow shutter speeds. This technique involves using a longer exposure time to intentionally blur moving subjects, such as flowing water, moving lights, or people in motion. The result is a captivating blend of sharp subjects and silky smooth bokeh trails, creating a visually striking image with a sense of movement.
To achieve this effect, set your camera to shutter priority mode or manual mode, select a slow shutter speed, and use a tripod or stable surface to prevent camera shake. Experiment with different subjects and compositions to capture the perfect bokeh in motion shot.
Post-Processing Techniques for Bokeh Enhancement
Post-processing is an essential step in bokeh photography, allowing you to enhance the bokeh effect and refine the overall quality of your images. By applying various techniques, you can maximize the potential of your bokeh and create stunning visuals.
RAW vs. JPEG: Maximizing Editing Flexibility
When editing bokeh photographs, shooting in RAW format offers significant advantages over JPEG. RAW files contain uncompressed data that retains more image information, giving you greater editing flexibility.
With RAW files, you can adjust various parameters such as exposure, white balance, and color saturation without compromising image quality.
Adjusting Highlights and Shadows for Bokeh Refinement
One of the key elements in bokeh enhancement is achieving a well-balanced distribution of highlights and shadows. By adjusting the highlights, you can control the brightness and intensity of the bokeh effect, while refining the shadows can add depth and dimension to your images.
Experiment with these adjustments to create the desired bokeh look that complements your subject.
Color Grading and Toning for Mood and Atmosphere
Color grading and toning play a crucial role in establishing the mood and atmosphere of your bokeh photographs. Use editing software to fine-tune colors, adjust contrast, and create visual harmony.
By applying color grading techniques, you can enhance the overall aesthetic appeal of your images and evoke specific emotions in your viewers.
Selective Sharpening and Blurring for Bokeh Control
Selective sharpening and blurring techniques give you precise control over the bokeh effect in your images. By selectively sharpening your subject, you can enhance its details and make it stand out from the blurred background.
Conversely, applying selective blurring to specific areas can further accentuate the bokeh and create a more visually appealing composition.
Post-Processing Techniques
| Technique | Description |
|---|---|
| RAW vs. JPEG | Shooting in RAW format allows for greater editing flexibility and preserves more image information. |
| Adjusting Highlights and Shadows | Control the brightness and depth of the bokeh effect by refining highlights and shadows. |
| Color Grading and Toning | Create the desired mood and atmosphere by fine-tuning colors and contrast. |
| Selective Sharpening and Blurring | Enhance subject details and accentuate the bokeh effect through selective sharpening and blurring. |
Bokeh Photography Ideas and Inspiration
Explore these bokeh photography ideas and gain inspiration to elevate your skills and create stunning images with captivating backgrounds.
Portrait Bokeh: Isolating Subjects and Creating Dreamy Backgrounds
To achieve mesmerizing portrait bokeh, focus on isolating your subject and creating a dreamy background. Use a wide aperture, such as f/1.8 or lower, to blur the background while keeping the subject in sharp focus.
Experiment with different poses and expressions to capture the essence of the person. The soft and dreamy bokeh will add depth and enhance the overall allure of your portraits.
Nature Bokeh: Capturing Magical Landscapes and Macro Shots
In nature bokeh photography, explore the beauty of magical landscapes and capture the intricate details of macro shots. Find a scenic location with a compelling foreground and background elements.
Use a wide aperture to create a shallow depth of field, highlighting the subject while turning the background into a colorful bokeh wonderland. Seek out captivating flowers, leaves, or tiny creatures to add a sense of enchantment to your nature bokeh images.
Street Bokeh: Adding Depth and Interest to Urban Scenes
Add depth and interest to your street photography by incorporating street bokeh techniques. Seek out visually appealing urban scenes, such as bustling city streets or vibrant marketplaces. Select a wide aperture and focus on a subject in the foreground, allowing the background to blur into captivating bokeh.
The resulting bokeh lights and shapes will add a dynamic element to your street photography, highlighting the energy and vibrancy of the urban environment.
Abstract Bokeh: Exploring Creative Shapes and Patterns
Unleash your creativity by exploring abstract bokeh photography, which involves capturing bokeh lights in unique shapes and patterns. Attach a DIY bokeh filter to your lens or use objects like cut-out shapes or tinfoil with small holes to create interesting bokeh effects.
Experiment with different apertures and distances to create various shapes and patterns. Abstract bokeh allows for artistic expression and opens up endless possibilities to create visually captivating images.
Bokeh Photography Ideas and Inspiration
| Photography Genre | Ideas |
|---|---|
| Portrait Bokeh | Capturing candid moments Using props or unique locations Experimenting with different lighting |
| Nature Bokeh | Photographing flowers and plants Macro shots of insects and wildlife Exploring bokeh through water and glass |
| Street Bokeh | Capturing night lights and cityscapes Finding interesting reflections and textures Using long exposure for light trails |
| Abstract Bokeh | Creating bokeh shapes with DIY filters Using various objects for unique bokeh patterns Experimenting with different color combinations |
Let these bokeh photography ideas and inspiration spark your imagination and push the boundaries of your creativity.
Whether you’re capturing portraits, exploring nature, roaming the streets, or diving into abstract compositions, bokeh adds a touch of magic and captivation to your images. Embrace the artistry of bokeh photography and let your creativity flow to create stunning visuals that leave a lasting impression.
Common Mistakes to Avoid in Bokeh Photography
Bokeh photography can produce stunning images with dreamy backgrounds and sharp subjects. However, there are some common mistakes that photographers often make when capturing bokeh. By being aware of these errors and avoiding them, you can enhance the overall quality of your bokeh photographs.
Focusing Errors: Ensuring Sharp Subjects and Smooth Bokeh
One of the key elements of bokeh photography is achieving a clear and sharp subject while maintaining a smooth bokeh effect in the background. Focusing errors can result in blurry subjects or an inconsistent bokeh effect. To avoid this mistake, follow these techniques:
- Use manual focus or focus lock to ensure that your subject is in sharp focus.
- Pay attention to your depth of field and select an appropriate aperture setting to control the focus plane and bokeh quality.
- Consider using focus peaking or magnification features on your camera to aid in achieving precise focus.
Overexposure: Balancing Highlights and Bokeh Brightness
Bokeh photography often involves capturing bright and beautifully lit backgrounds, but this can lead to overexposure in certain scenarios. To balance the highlights and bokeh brightness, keep the following in mind:
- Understand your camera’s exposure settings and use techniques such as exposure compensation to avoid blowing out the highlights.
- Consider using a neutral density (ND) filter to reduce the amount of light in bright situations, allowing for better exposure control and preserving details in the highlights.
- Experiment with different shooting angles and compositions to minimize the impact of strong light sources on your bokeh.
Cluttered Backgrounds: Simplifying Compositions for Better Bokeh
A cluttered or distracting background can diminish the impact of your bokeh. To create a visually appealing bokeh effect, follow these composition techniques:
- Choose a clean and uncluttered background that complements your subject and adds to the overall aesthetic.
- Avoid elements such as power lines, poles, or other distracting objects that can disrupt the smoothness of the bokeh.
- Consider using a wide aperture to create a shallow depth of field and blur the background, further enhancing the bokeh effect.
Neglecting Foreground: Incorporating Depth for Enhanced Bokeh
Foreground elements play a crucial role in creating depth and enhancing the overall bokeh effect. Neglecting the foreground can result in a flat and two-dimensional image. To incorporate depth and enhance your bokeh, consider the following:
- Look for opportunities to incorporate foreground elements such as flowers, leaves, or other objects that frame the main subject.
- Experiment with different perspectives and angles to create a sense of depth and layering in your composition.
- Use leading lines or foreground objects to guide the viewer’s gaze towards the main subject, creating a more engaging bokeh photograph.
In summary, avoiding focusing errors, balancing highlights, simplifying compositions, and incorporating foreground elements are essential steps in capturing stunning bokeh photography.
By being mindful of these common mistakes, you can elevate your bokeh images to a new level of visual appeal and creativity.
Conclusion
In conclusion, mastering the art of bokeh photography in 2024 requires a solid understanding of the principles and techniques we have explored in this article. By applying the tips, tricks, and techniques discussed, you can elevate your bokeh photography skills and capture stunning images with dreamy backgrounds and standout subjects.
Remember to choose the right equipment, such as lenses with wide apertures, and understand how aperture, shutter speed, and ISO settings can affect your bokeh quality. Pay attention to composition techniques, subject placement, and background selection to create visually appealing bokeh compositions.
Lighting plays a crucial role in enhancing the bokeh effect, so experiment with natural light, artificial light sources, and reflective surfaces to create captivating bokeh. Moreover, don’t forget to refine your bokeh through post-processing techniques, adjusting highlights and shadows, and applying selective sharpening and blurring.
Ultimately, to elevate your bokeh photography skills in 2024, it is essential to practice and experiment. Try new ideas and stay inspired by exploring different genres of bokeh photography. With dedication and persistence, you can take your bokeh photography to new heights and create images that captivate viewers with their dreamy, ethereal allure.


