Top 10 Tips for Perfect 360 Photography Shots
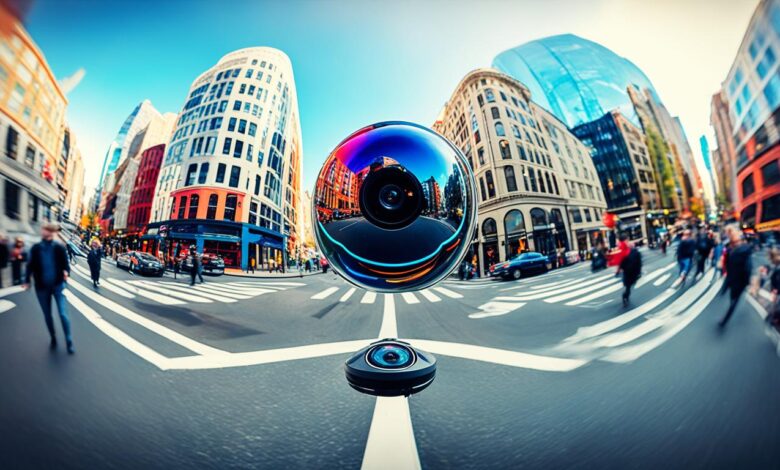
Have you ever wished you could freeze a moment in time and relive it whenever you wanted? To capture not just a single frame, but an entire world in all its glorious detail? With 360-degree photography, that dream becomes a reality.
Imagine being able to transport yourself back to a cherished vacation, feeling the warmth of the sun on your skin and hearing the laughter of your loved ones. Or immersing yourself in a breathtaking landscape, where every twist and turn reveals a new marvel. 360 photography shots offer you the power to preserve these moments and share them with others in a way that is truly captivating.
Whether you’re an aspiring photographer or a seasoned professional, this guide is your gateway to unlocking the incredible potential of 360-degree photography. From seamlessly stitching panoramic images to creating immersive virtual tours, you’ll discover the tips and techniques to elevate your skills and capture breathtaking moments in a whole new dimension.
Get ready to embark on a journey where every corner holds a story, where every tiny detail matters, and where your creativity knows no bounds. It’s time to dive into the world of 360 photography shots and unleash your artistic vision.
Selecting the Right Equipment for Spherical Photography
When it comes to capturing high-quality 360-degree photographs, selecting the right equipment is essential. In this section, we will explore the importance of choosing the right camera equipment for spherical photography, including DSLR cameras and dedicated 360 cameras. We will also discuss the role of camera lenses in enhancing image clarity and the significance of tripods and monopods in achieving steady shots.
Choosing Between DSLR Cameras and Dedicated 360 Cameras
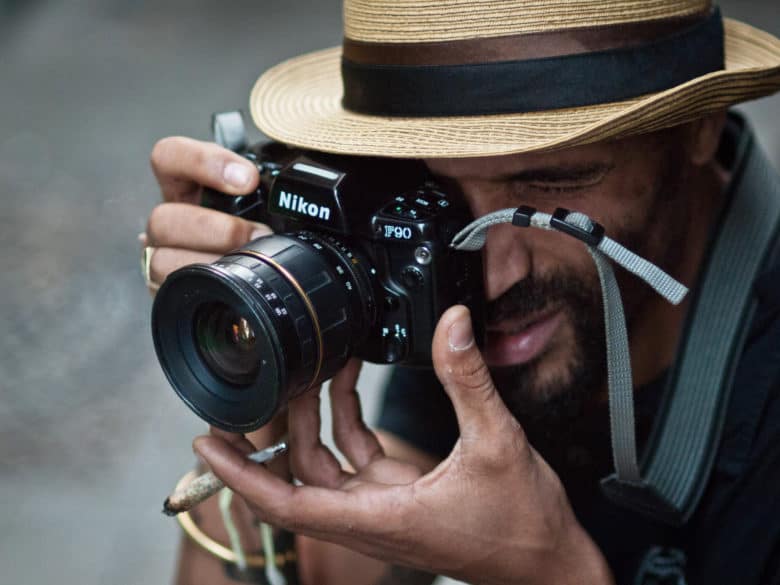
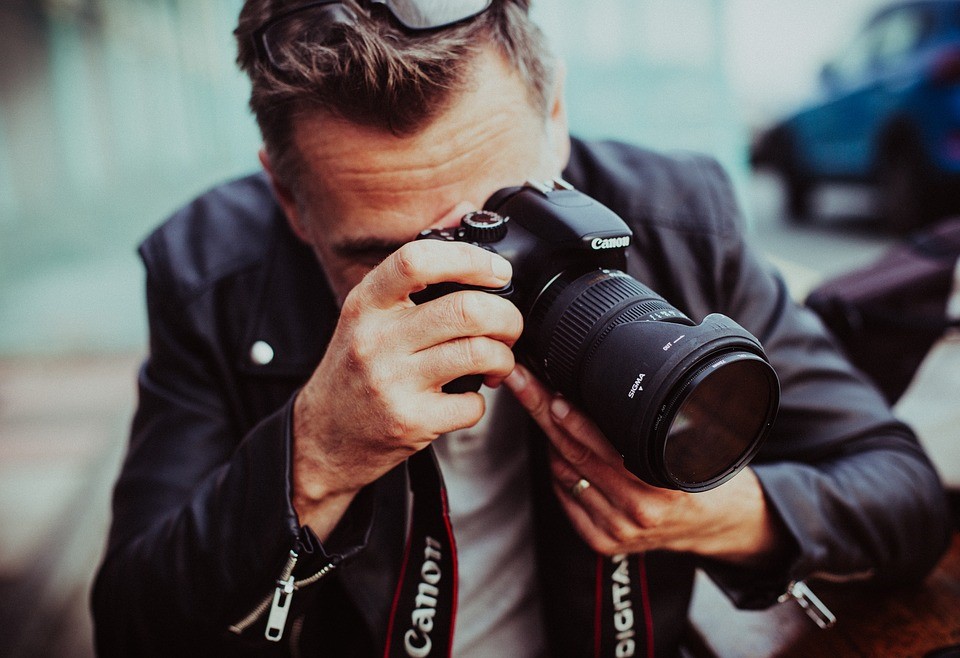
When deciding between DSLR cameras and dedicated 360 cameras, it’s important to consider your specific needs and preferences. DSLR cameras offer versatility and control over settings, allowing photographers to capture stunning panoramic images with their existing camera equipment. On the other hand, dedicated 360 cameras are designed specifically for spherical photography, offering ease of use and built-in stitching capabilities. Both options have their pros and cons, so make sure to choose the one that aligns with your shooting style and requirements.
Considering Camera Lenses for Enhanced Image Clarity
Camera lenses play a crucial role in enhancing image clarity in spherical photography. Wide-angle lenses are commonly used for capturing a wider field of view, allowing you to include more of the scene in your 360-degree photographs. It’s recommended to choose lenses with a low distortion and high resolution to ensure sharp and detailed images. Consider investing in fisheye lenses or rectilinear lenses specifically designed for panoramic photography to achieve optimal image quality.
Evaluating Tripods and Monopods for Steady Shooting
One of the challenges in spherical photography is maintaining camera stability to avoid motion blur and unwanted distortions. Tripods and monopods are essential tools for achieving steady shots, especially when capturing long exposures or shooting in low-light situations. Tripods provide maximum stability and are suitable for situations where you need to keep the camera stationary for an extended period. Monopods, on the other hand, offer more mobility and are ideal for quick setups and shooting on the go. Evaluate your shooting conditions and preferences to determine whether a tripod or monopod will best suit your needs.
The Importance of Lighting in 360-Degree Photography
Lighting plays a crucial role in 360-degree photography. Proper lighting techniques can greatly enhance the quality and impact of your panoramic images. Whether you’re shooting indoors or outdoors, understanding how to manipulate light can make all the difference in creating visually striking 360-degree photographs.
When it comes to lighting in photography, there are various techniques you can employ to achieve the desired effect. Let’s explore some of these techniques:
- Natural Light: Utilizing natural light sources, such as sunlight or moonlight, can create a soft and ethereal atmosphere in your 360-degree photos. Pay attention to the direction and intensity of the light to highlight the subject and create dynamic lighting patterns.
- Artificial Light: Using artificial lighting, such as studio lights or external flash units, gives you precise control over the lighting conditions. This allows for more creativity and flexibility in illuminating your scene and highlighting specific areas or subjects within the frame.
- Light Modifiers: Light modifiers, such as diffusers and reflectors, can help you shape and control the light to achieve the desired mood and effect. Diffusers soften the light, reducing harsh shadows, while reflectors bounce and redirect light to fill in shadows and enhance overall illumination.
- Lighting Ratios: Understanding lighting ratios is essential for balancing the different light sources in your 360-degree photographs. By adjusting the intensity and placement of your lights, you can create a captivating interplay of light and shadow, adding depth and dimension to the scene.
- Color Temperature: The color temperature of light affects the overall mood and atmosphere of your photos. Experiment with different color temperatures, such as warm or cool lighting, to evoke specific emotions and enhance the visual impact of your 360-degree images.
By understanding and implementing these lighting techniques, you can elevate your 360-degree photography to new heights. Remember, lighting is not just a technical aspect of photography, but also a creative tool that allows you to convey emotions and tell compelling visual stories.
Maintaining Camera Stability for Sharp Images
When it comes to capturing sharp and blur-free images in 360-degree photography, camera stability is absolutely crucial. Even the slightest camera movement can result in blurry or distorted images, diminishing the overall quality of your panoramic shots. In this section, we will explore two key factors that contribute to camera stability: the effective use of tripods and monopods, and the use of a remote shutter release to minimize vibrations.
Effective Use of Tripods and Monopods
To achieve maximum camera stability, tripod and monopod usage is highly recommended. These accessories provide a solid and secure base for your camera, minimizing any unwanted vibrations or movement.
Tripods are especially beneficial when shooting in low light conditions or with longer exposure times, as they keep the camera steady throughout the entire duration of the shot. Monopods offer more mobility and flexibility, making them ideal for capturing dynamic scenes while still maintaining stability.
Using a Remote Shutter Release to Minimize Vibrations
Another effective technique for maintaining camera stability is the use of a remote shutter release. When you press the shutter button directly on the camera, it can cause vibrations that can affect the sharpness of your images. By utilizing a remote shutter release, you can trigger the camera without any physical contact, minimizing the risk of introducing vibrations.
This method is particularly useful when shooting in long exposure or time-lapse situations, as it allows for the utmost precision and stability.
By incorporating both tripods/monopods and remote shutter release into your 360-degree photography workflow, you can significantly improve the stability of your camera, resulting in sharper and more professional-looking images.
Mastering the Techniques of Image Stitching
Image stitching is a crucial technique in 360-degree photography for creating seamless panoramas. By seamlessly merging multiple images together, image stitching allows photographers to capture expansive scenes and present them as a single cohesive image.
In this section, we will explore the process of image stitching and discuss software tools that can assist in image blending and alignment. Additionally, we will explain the importance of overlap in achieving seamless and professional-looking panoramas.
Image Blending and Alignment with Software Tools
When stitching images together, it is important to blend the edges of each image seamlessly, creating a smooth transition between them.
This ensures that the final panoramic image appears cohesive and natural. Software tools, such as Adobe Photoshop and PTGui, offer advanced blending techniques that automatically align and blend the images to create a seamless result. These tools allow photographers to adjust blending settings, such as feathering and opacity, to achieve the desired effect.
Understanding the Role of Overlap in Seamless Panoramas
Overlap is a critical component in image stitching, as it provides the necessary information for alignment and blending. When capturing images for a panorama, it is important to ensure that each image has a sufficient amount of overlap with the adjacent images.
This overlap allows the stitching software to accurately align the images and blend them together seamlessly. Without proper overlap, the resulting panorama may contain visible seams or distortions.
Exploring Creative Composition in 360 Photography Shots
When it comes to capturing stunning 360-degree photographs, creative composition plays a vital role in elevating the visual impact of your shots. By employing various composition techniques, you can transform ordinary panoramic images into captivating works of art that engage your viewers. In this section, we will delve into the world of creative composition in 360 photography and provide you with valuable tips for achieving awe-inspiring compositions.
One essential composition technique to consider is the rule of thirds. By dividing your frame into a grid of nine equal sections and placing key elements along the gridlines or at their intersections, you can create a visually balanced and more engaging composition. This technique helps to avoid placing important elements at the center, resulting in a more dynamic and visually interesting photograph.
Another composition technique that can add depth and intrigue to your 360-degree photographs is the use of leading lines. By incorporating natural or man-made lines that guide the viewer’s eye through the image, you can create a sense of depth and enhance the overall visual impact. Leading lines can be found in various forms, such as paths, roads, railings, and architectural elements.
Symmetry is yet another powerful composition technique that can elevate your panoramic shots. By capturing symmetrical scenes or elements, you can create a sense of balance and harmony in your photographs. Symmetry can be found in natural landscapes, architectural structures, and even in the arrangement of objects.
Furthermore, don’t be afraid to experiment with different perspectives and viewpoints to add a unique twist to your compositions. By finding interesting angles or shooting from unusual vantage points, you can create a fresh and captivating perspective that engages your audience.
To further enhance your compositions, make sure to pay attention to the placement of key elements and their relationship to the background and foreground. By carefully considering the positioning and size of objects within your frame, you can create a sense of scale and depth that adds interest and drama to your photographs.
Remember, creative composition is about thinking outside the box and pushing the boundaries of traditional photography. By exploring different techniques and experimenting with various composition elements, you can take your 360-degree photographs to the next level and create visually stunning images that leave a lasting impression.
| Composition Technique | Description |
|---|---|
| Rule of Thirds | Divide your frame into a grid of nine equal sections and place key elements along the gridlines or at their intersections to create a visually balanced and engaging composition. |
| Leading Lines | Incorporate natural or man-made lines that guide the viewer’s eye through the image, adding depth and enhancing the overall visual impact of your photograph. |
| Symmetry | Capture symmetrical scenes or elements to create a sense of balance and harmony, adding interest and visual appeal to your 360-degree photographs. |
| Unique Perspectives | Experiment with different angles and viewpoints to add a fresh and captivating perspective to your compositions, engaging your audience in new and exciting ways. |
| Placement and Relationship | Consider the positioning and size of key elements within your frame, as well as their relationship to the background and foreground, to create a sense of scale and depth in your photographs. |
Optimizing Camera Settings for VR Integration
In order to seamlessly integrate 360-degree photographs into virtual reality experiences, it is essential to optimize camera settings for the best results. Two critical aspects to consider are adjusting exposure for balanced light across the scene and selecting the appropriate shooting mode for dynamic scenes.
Adjusting Exposure for Balanced Light Across the Scene
Achieving balanced exposure when capturing 360-degree photographs is crucial for creating visually appealing and immersive VR experiences. By adjusting the exposure settings, you can ensure that all areas of the scene are well-lit and that details are preserved.
Consider using the following camera settings to achieve balanced exposure:
- Aperture: Adjust the aperture to control the amount of light entering the camera. A smaller aperture (higher f-number) will increase the depth of field and help maintain sharpness throughout the scene.
- ISO: Increase the ISO in low-light situations to capture more light. Be mindful of noise, as higher ISO settings can introduce digital noise into the image.
- Shutter Speed: Adjust the shutter speed to control the amount of time the camera sensor is exposed to light. A slower shutter speed may be necessary in darker environments to gather more light.
Experimenting with different exposure settings and using the camera’s histogram display can help you achieve optimal exposure for your 360-degree photographs.
Selecting the Appropriate Shooting Mode for Dynamic Scenes
When capturing dynamic scenes in 360-degree photography, selecting the appropriate shooting mode is essential to ensure that all details are captured accurately. Different shooting modes offer varying capabilities and can help enhance the quality of your VR integration.
Consider the following shooting modes:
- Manual Mode: Allows full control over all camera settings. This mode is ideal for experienced photographers who want complete control over the exposure settings.
- Shutter Priority Mode: Allows you to set the desired shutter speed while the camera automatically adjusts the aperture and ISO. This mode is useful when capturing fast-moving subjects.
- Aperture Priority Mode: Allows you to set the desired aperture while the camera automatically adjusts the shutter speed and ISO. This mode is suitable for controlling the depth of field in your images.
- Program Mode: Provides a balance between automatic and manual control, allowing you to adjust certain settings while the camera takes care of others. This mode is useful for capturing scenes quickly without needing to adjust every setting manually.
By understanding the capabilities of each shooting mode and selecting the most appropriate one for your specific scene, you can ensure that your dynamic 360-degree photographs integrate seamlessly into virtual reality experiences.
Enhancing Quality with Post-Processing Techniques
Post-processing techniques play a crucial role in elevating the quality of 360-degree photographs. By applying various editing techniques, you can enhance your panoramic images, achieve noise reduction and color correction, and add greater detail through HDR techniques. Let’s explore these post-processing techniques in more detail.
Editing for Noise Reduction and Color Correction
When it comes to post-processing 360-degree photographs, noise reduction and color correction are essential steps to ensure optimal image quality. Noise can be introduced during the image capture process, particularly in low-light conditions. By utilizing editing software, you can reduce noise and create cleaner and more visually appealing images.
Color correction is another crucial aspect of post-processing. It allows you to adjust the color balance, saturation, and tonal range of your images, ensuring accurate and vibrant colors. Through color correction, you can enhance the overall visual impact of your 360-degree photographs and create a more immersive viewing experience.
Applying HDR Techniques for Greater Detail
HDR (High Dynamic Range) techniques are widely used in photography to capture a broader range of tones and details in high-contrast scenes. In the case of 360-degree photography, HDR techniques can significantly enhance the detail and dynamic range of your panoramic images.
By combining multiple exposures of the same scene, taken at different exposure levels, you can create an HDR image that showcases both the highlights and shadows in a more balanced way. This technique brings out the intricate details in your 360-degree photographs and creates a more realistic and immersive viewing experience for your audience.
By incorporating post-processing techniques such as noise reduction, color correction, and HDR, you can take your 360-degree photographs to the next level. These techniques allow you to enhance image quality, bring out the true colors, and capture intricate details that will captivate your audience. Don’t be afraid to experiment with different editing software and techniques to find the perfect balance for your panoramic images.
Planning and Scouting Your Location for Virtual Tours
When it comes to capturing captivating 360-degree photographs for virtual tours, planning and scouting your location is essential. By carefully evaluating the scene and incorporating elements of storytelling and visual narrative, you can create immersive virtual tours that engage viewers and leave a lasting impression.
Evaluating the Scene for Potential Stitching Challenges
Before embarking on your virtual tour photography journey, it’s important to assess the scene for any potential stitching challenges. This involves identifying objects or elements that may disrupt the seamless merging of images, such as moving objects or complex architectural features. By identifying these challenges in advance, you can plan your shots accordingly and minimize any potential issues during the stitching process.
Incorporating Elements of Storytelling and Visual Narrative
Storytelling and visual narrative are powerful tools that can enhance the impact of your virtual tours. By considering the emotions, stories, or themes you want to convey through your photography, you can strategically compose your shots to evoke a specific response from viewers. Whether it’s highlighting the historical significance of a location or creating a sense of exploration and discovery, incorporating storytelling elements will make your virtual tours more engaging and memorable.
One effective way to incorporate storytelling and visual narrative is by carefully choosing the subject of your photographs. Selecting key elements within the scene that evoke a sense of intrigue or tell a story will captivate viewers and draw them deeper into the virtual tour experience. Additionally, consider the composition and framing of your shots to guide the viewer’s eye and create a visual flow that enhances the narrative.
Creating immersive virtual tours requires careful planning and attention to detail. By evaluating the scene for potential stitching challenges and incorporating elements of storytelling and visual narrative, you can capture compelling 360-degree photographs that transport viewers to unique and captivating locations.
Conclusion
360-degree photography is an exciting and rapidly growing field that offers endless possibilities for capturing stunning panoramic images and creating immersive virtual reality experiences. Throughout this article, we have explored the key tips and techniques for perfecting your 360-degree photography shots.
We have discussed the importance of selecting the right equipment, from choosing between DSLR cameras and dedicated 360 cameras to evaluating different camera lenses for enhanced image clarity. We have also highlighted the significance of lighting in creating visually striking panoramic images and provided valuable tips for achieving well-lit shots using natural or artificial light sources.
In addition, we have emphasized the importance of maintaining camera stability to capture sharp and blur-free images. The effective use of tripods and monopods, as well as the use of a remote shutter release, can greatly enhance camera stability and minimize vibrations. Furthermore, we have explored the techniques of image stitching and discussed software tools for image blending and alignment, ensuring seamless and professional-looking panoramas.
By exploring creative composition techniques, you can add depth and visual interest to your 360 photography shots. We have delved into various composition techniques such as the rule of thirds, leading lines, and symmetry, which can elevate your panoramic images and make them more engaging.
Optimizing camera settings is crucial for integrating 360-degree photographs into virtual reality experiences. We have discussed the importance of adjusting exposure and selecting the appropriate shooting mode for various scenes, enabling a balanced light distribution and capturing dynamic moments in your 360 photography shots.
Finally, we have highlighted the significance of post-processing techniques in enhancing the quality of your panoramic images. From editing for noise reduction and color correction to applying HDR techniques for greater detail and dynamic range, these techniques can take your 360-degree photography shots to the next level.
In conclusion, with the right equipment, techniques, and creative vision, you have the power to capture breathtaking panoramic images and create immersive virtual reality experiences. So grab your camera, get out there, and start exploring the limitless possibilities of 360-degree photography.
360 Photography Shots FAQs
What are some of the key tips for capturing perfect 360 photography shots?
Some key tips for capturing perfect 360 photography shots include selecting the right equipment, mastering image stitching techniques, optimizing camera settings, and incorporating creative composition techniques.
What is the importance of selecting the right equipment for spherical photography?
Selecting the right equipment for spherical photography is crucial for capturing high-quality images. This includes choosing between DSLR cameras and dedicated 360 cameras, considering camera lenses for enhanced image clarity, and evaluating the use of tripods and monopods for steady shots.
How does lighting play a role in 360-degree photography?
Lighting is essential in 360-degree photography as it can greatly enhance the visual appeal of panoramic images. This section explores various lighting techniques to create well-lit and visually striking 360-degree photographs using natural light and artificial light sources.
How can camera stability be maintained for sharp images in 360-degree photography?
Camera stability is crucial for capturing sharp and blur-free images in 360-degree photography. The effective use of tripods and monopods, as well as the use of remote shutter release cables to minimize vibrations, can help achieve camera stability.
What is the process of image stitching and its importance in 360-degree photography?
Image stitching is a crucial technique in 360-degree photography for creating seamless panoramas. This section discusses the process of image stitching and explores software tools that can assist in image blending and alignment. Additionally, it explains the importance of overlap in achieving seamless and professional-looking panoramas.
What are some composition techniques that can enhance 360 photography?
Composition is key in creating visually appealing 360-degree photographs. This section explores various composition techniques such as the rule of thirds, leading lines, and symmetry, which can elevate panoramic shots and create more engaging compositions.
How can camera settings be optimized for seamless integration into virtual reality experiences?
Optimizing camera settings is crucial for seamlessly integrating 360-degree photographs into virtual reality experiences. This section discusses the importance of adjusting exposure to achieve balanced light across the scene and explores different shooting modes suitable for capturing dynamic scenes in 360 photography.
How can post-processing techniques enhance the quality of 360-degree photographs?
Post-processing techniques can greatly enhance the quality of 360-degree photographs. This section explores various editing techniques for noise reduction and color correction and discusses the application of HDR techniques to achieve greater detail and dynamic range in panoramic images.
What factors should be considered when planning and scouting locations for virtual tours?
Planning and scouting the location for virtual tours is essential for capturing captivating 360-degree photographs. This section discusses the importance of evaluating the scene for potential stitching challenges and offers tips for overcoming them. Additionally, it explores the incorporation of elements of storytelling and visual narrative to create immersive virtual tours.
What are the key points to consider regarding 360-degree photography and creating immersive virtual reality experiences?
This section summarizes the key points discussed in the article and highlights the importance of 360-degree photography in creating immersive virtual reality experiences. It also emphasizes the potential for creating stunning panoramic images and the role of 360-degree photography in visual storytelling.


